Fast(er) Roasted Potatoes

Roasted Potatoes

Click here for – Fast(er) Roasted Potatoes

His scent was that of a printing press. Inky. Mixed with a bit of Old Spice. An earthy undertone brought it all together in a warm blanket of protection. Consistency. He was my short, solid, bearded, refuge. He was my Dad.

Certain memories of him are in full, vibrant color. The sounds fill my ears like a wave of warmth. I can easily  trick my brain to go there.  On his lap of his La-Z-Boy recliner. The orchard. The garden.

Especially the garden. Every time I bend over the sink and wash potatoes I go to him in the garden.

It was a damp day, but he needed the soil to give way to the shovel. If we waited, the new red potatoes would get too big. The earth too hard. So I stood by the empty bushel basket and waited for him to bring up the first blade-full of dirt. The soil gave way and little burgundy gems peaked out to the daylight. I eagerly fell to my knees and plucked them out.

He moved on down the row and brought up each mound of dirt, his smile getting bigger all the way. It was a good crop. I scooted on my little bottom and knees, filling the bushel basket handfuls at a time, pushing the dirt back into place with my bare hands.

He stood at the edge of the garden. Sweaty. Smiling. Admiring the full basket of labor. I stood up and he looked in my direction. His eyes went from my head, to my filthy hands, to my soiled clothes.

With a smirk, he said, “Your Mother’s going to kill me.”

Finish tilling garden


Advertisement

Strawberry Pie (with bonus gluten free dough recipe!)

Strawberry Pie 1

Finish tilling garden
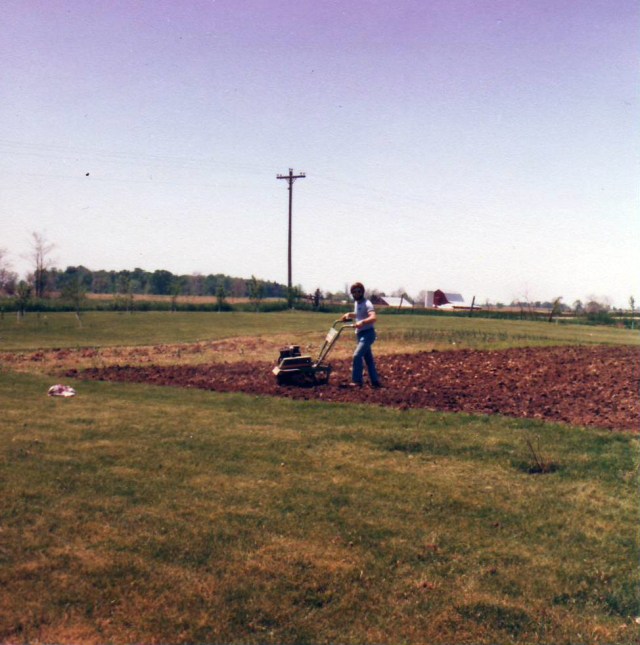
It has been more than twenty years since I sat in the garden at the farm house. The wide patch of strawberries sat perpendicular to the rows of onions, potatoes, green beans, and corn, and I sprawled out in the gap in between. With my Tonka trucks and dirt movers, die cast cars and a small trowel, I mounded dirt, made roads and dug rivers. My parents spent the day bent at the waist, weeding, planting, and tending to their precious crop, and our Black Labrador wondered about. She eventually ended up huffing and plopping right down in the middle of my ‘town’. Nosing my leg for attention, I complied and drove cars up and over her like a big mountain.

_______________________________________

I didn’t even give my husband a chance to think about it or plan something special. When I saw that my neighbor wanted to remove the neglected raised garden beds from his property, I eagerly made a deal that we (my husband!) would remove them if I could have all the (rich and beautiful!) soil they contained. “Hey, Honey…. you don’t have to worry about getting me anything for Mother’s Day! Just move these for me!”

“Fine, but you get to move the dirt.”

Raised Beds Before and After

(Here is a before and after of the rebuild/relocation.
It took me two weeks to play in, I mean move, the dirt.)

So now I have a garden. Tomatoes, cucumbers, pumpkins, peppers, cabbage, oregano, basil, and asparagus. For those of you wondering how I planted all of that in just these two boxes? Well… I kinda, sorta, expanded to a third. And I might have two blueberry bushes now, too.

Is this my midlife crisis?

I better just eat this pie and think about that for a while.

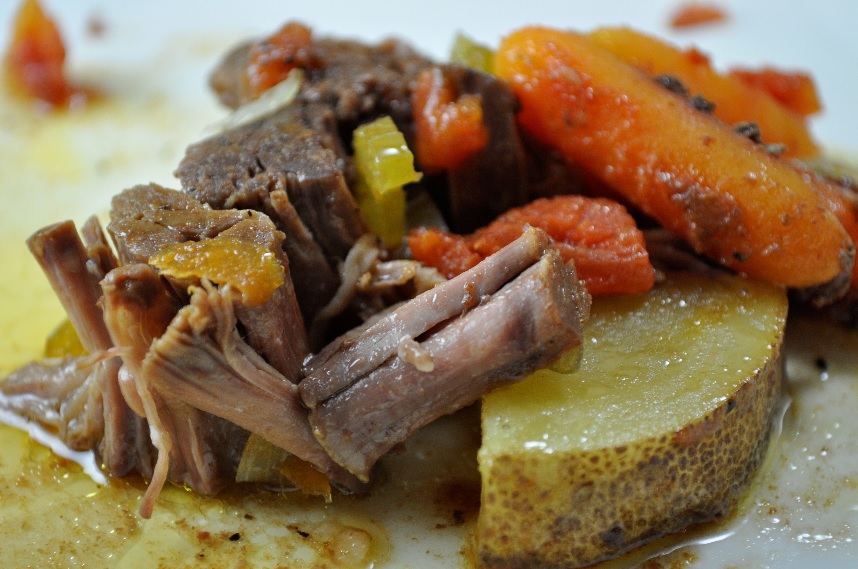
(There are three – count em! – THREE recipes here. Two pie crusts, and the strawberry pie filling with topping.)

Strawberry Pie  (Adapted from From Cook’s Country Icebox Strawberry Pie – June 2009)

Serves 8

It is imperative that the cooked strawberry mixture measures 2 cups; any more and the filling will be loose. If your fresh berries aren’t fully ripe, you may want to add extra sugar to taste in step 2. Use your favorite pie dough or use the ‘Oil Pie Crust for Fruit Pies’ or ‘Gluten Free Pie Crust’ below. This pie is even tastier after living in the refrigerator for twenty four hours.

Ingredients

1 (9-inch) pie shell, baked and cooled (see recipes below)

Filling:

2 pounds frozen strawberries
2 tablespoons lemon juice
2 tablespoons water
1 tablespoon unflavored gelatin (or two 1/4 ounce envelopes of Knox Gelatine)
1 cup sugar
Pinch salt
1 pound fresh strawberries, hulled and sliced thin

Topping:

4 ounces cream cheese , softened
3 tablespoons sugar
1/2 teaspoon vanilla extract
1 cup heavy cream

Filling Preparation:

Cook frozen berries in large, heavy saucepan over medium-low heat until berries begin to release juice, about 3 minutes. Increase heat to medium-high and cook, stirring frequently with a rubber spatula, until thick and jam-like, about 25 minutes (mixture should measure 2 cups, exactly). Remove from heat.

In a small bowl, combine lemon juice, water, and gelatin with a fork. Let stand until gelatin is softened and mixture has thickened, about 5 minutes. Stir gelatin mixture, sugar, and salt into cooked berry mixture and return to simmer, about 2 minutes. Transfer to bowl and cool to room temperature, about 30 minutes.

Fold fresh berries into filling. Spread evenly in pie shell and refrigerate until set, about 4 hours. (Filled pie can, and is better tasting, after refrigerated for 24 hours.)

Topping Preparation:

With electric mixer on medium speed, beat cream cheese, sugar, and vanilla until smooth, about 30 seconds. With mixer running, slowly add cream in one continuous stream. Stop mixer and scrape down sides with a rubber spatula. Return mixer to medium/high speed and whip until stiff peaks form, about 2 minutes. Serve pie with whipped cream topping. (I spread the topping over the entire pie and smooth with an off-set spatula. Others prefer to dollop the topping on each piece of sliced pie. Do what feels right to you – I won’t judge!)

Oil Pie Crust (for fruit pies)

Ingredients
1-1/2 cups flour
1 teaspoon salt
1/2 cup oil
2 tablespoons milk
1-1/2 tablespoons granulated sugar

Preparation

Preheat oven to 350 degrees and set rack to the middle position.

In a stand mixer with the paddle attachment, mix the flour, salt and sugar on low for about ten seconds. In a steady stream, slowly add oil and milk. Mix until dough is a sandy texture.

Transfer dough to a glass or aluminum pie pan. Pat dough evenly over the bottom and up the sides of the pan. Using a fork, prick the bottom four times, and evenly around the sides eight times. This will help prevent bubbling while baking.

Bake at 350 degrees for 15-18 minutes, until the crust is no longer moist and is starting to slightly brown.
Cool the baked pie crust on a wire rack for at least one hour before filling.

Gluten Free Pie Dough

Yields 1, 9″ Pie Shell

Ingredients
2 1/2 tablespoons ice water
1 1/2 tablespoons very cold sour cream
1 1/2 ounce white wine vinegar or rice vinegar
6 1/2 ounces gluten free flour blend**
1 1/2 teaspoon sugar
1/2 teaspoon salt
1/4 teaspoon zanthan gum
8 tablespoons frozen butter cut (with a very sharp knife) into 1/4 square inch pieces

**Gluten Free Flour Blend

24 ounces white rice flour (4 ½ cups, plus 1/3 cup) (one bag of Bob’s Red Mill brand)
7 ½ ounces brown rice flour (1 2/3 cups)
7 ounces potato starch (not potato flour) (1 1/3 cup)
3 ounces tapioca starch (also called tapioca flour) (3/4 cup)
¾ ounce nonfat milk powder (3 tablespoons)

Preparation

(Notes: Use a seven cup, or larger, food processor for this single batch. If you want to make a double crust pie, do not double this recipe in one food processor batch. Take the time to do it twice, trust me. This is experience talking. Do not skimp on freezing the butter. Again, trust me on this one.)

In a small bowl, combine the ice water, sour cream and vinegar with a fork. Place bowl in freezer while you prep the next steps.

Place flour blend, sugar, salt and zanthan gum in the food processor. Combine for five seconds. Scatter frozen butter pieces over top and pulse ten times. Dollop the (very cold) sour cream mixture over top and pulse until the texture is sandy, about ten times.

Spread a large piece of plastic wrap out on the counter top. Carefully dump the contents of the food processor onto the wrap. Gather the dough into the center and work it into a solid six inch round disk. Wrap the disk tightly with the wrap and refrigerate for one hour. (This one hour resting time is important. Your dough will be sandy and gritty if you skip this step.)

Rolling the dough:

Prep your pie pan. Lightly grease the very bottom of the pie pan – not the sides. Set aside.

First rule – do not add flour!

Adding flour to the rolling process negates the resting time to rid of the gritty texture. Instead, place two lengths of plastic wrap out on the counter top. Slightly overlap them to make a continuous 18″x18″ covered work surface. Unwrap the chilled dough disk and place it in the center of your prepare surface. Cover the disk with another two sheets of wrap, again, slightly overlapping to make a continuous 18′”x18″ sheet.

Using a rolling pin, start in the center of the dough disk and roll out to the edge. Bring the pin back to the center and roll out the edge in a different direction. Do this over and over again until the disk doubles is size. Sometimes the dough will not roll out in a perfect circle, leaving gaps and cracks. Stop, remove the top wrap and pinch the dough into a circle. Replace wrap and continue to roll from the center in all directions until you have a pie shell measuring about 12″ across.

Transfer the dough to the pie pan:

Remove the top layer of wrap from your pie shell. Lift the bottom layer of wrap and slide a flat hand under the dough to the center of the circle. With your other hand, invert the pie pan over your dough and carefully turn (slowly flip) both hands over, ending up with the pie pan right side up and the dough resting inside. Work the dough into the sides of the pan and very carefully remove the (now top) layer of wrap.

Gently roll the extra dough under the edge and pinch all the way around the pan, making the design of your choice.

Strawberry Pie 3

Loosely cover with plastic wrap and chill in the refrigerator for one hour, or the freezer for thirty minutes.

Pre heat oven to 350 degrees.

Bake 24-30 minutes, rotating half way through, until no longer doughy and slightly brown along the edges. Cool completely before adding fruit filling.

Ohio Sweet Corn

Sweet Corn

In the dead of winter I sometimes stare out my back window at the crusty, white land. The trees are bare and seem to shudder in the cold as the wind cuts across the pond and ice crystals dance on the frozen surface.

IMG_4673_stitch

It’s hard to believe that just a few months prior we were grilling out, picking tomatoes fresh from the vine and nibbling away at ears of sweet corn dripping with salted butter. I often wonder how this frigid landscape can possibly be transformed back to the lush green habitat of the grey heron and family of mallard ducks. As I sit there, with my warm cup of coffee and thick sweater, and I am thankful that back in August we stood over boiling pots of water and shucked one-hundred-fifty-six ears of corn. I slide on my slippers, hold my breath for the blast of cold and open the garage door.  I shuffle out to the freezer and back again as fast as my feet can carry me and I carry a bag of gold. Ohio sweet corn. In the dead of winter.

I pull a sauce pan from the cupboard, break up the frozen treasure, and add butter and salt. When it is finally steaming hot, I take a bite and I am transformed. Sometimes all the way back to my childhood with visions of my Dad hard at work in the garden. The chill of winter is temporarily forgotten.

Finish tilling garden


Corn 4

Processing Sweet Corn

Bring deep pots of water to a rolling boil.

(If you have an electric kettle, it comes in handy. Fill it, set it to a boil, and use this water to top off the pots as needed.)

Shuck the ears of corn and remove as much silk as possible.

Place as many ears of corn in the pot(s) as you can without crowding. Making sure the entire ear(s) are submerged.

Boil for 3-4 minutes. Remove immediately to a rimmed baking sheet.

Let cool for about 10 minutes.

Using a cutting board and knife (or your favorite cutting tool over a bowl) remove all the corn from the cob. Here is the most important part: Get all that  juice from the cob. To do this, stand the cob on end in a large bowl. Starting from the top, hold a knife at about a 45 degree angle and scrap all the way down. Rotate the cob and repeat until the entire ear is finished.

Portioning and Storing

Our family will eat 1 1/2 cups corn, as a side dish, at an average meal. I prefer using 1 quart Ziploc freezer bags.

Measure amount of corn into bag – and don’t forget to add some of the juice from the bottom of the bowl in each one.

Close the bag 3/4 of the way. Lay it down on a flat surface and press the corn out, filling the bottom corners of the bag and working as much air out of the top as possible. Seal the bag completely. Label month and year with a Sharpie.

I like to press the bags as flat as possible and stack in a box.

Place in freezer.

NOTE: 13 Dozen ears of corn yielded 93 bags of corn (1 1/2 cup each).


Bacon Wrapped Asparagus

Bacon Wrapped Asparagus

The House

They were living in the church parish house and decided it was time to get a place of their own. Down the country road stood an old farmhouse on an overgrown lot among acres of field owned by the neighboring farmers. The house was built in the mid 1800s and in its heyday it boasted a spring house, smoke house, shed, large stable barn with a hay loft, the creek, and land as far as the eye could see.

The fields were sold off to other farmers over time and the only thing left was the house on about one-and-a-half acres and the shed – all in abandoned condition. The large stable barn still stood, but a fence now separated it from the house, sold with the neighboring parcel.

My parents bought the fixer-upper with great excitement and a vision of a house of their own. They already had a toddler girl, and this house had the space they needed for their growing family.

The interior had plaster and lath walls, burn marks above most every electrical outlet due to fires, and the previous owners housed sheep in the basement. This was the project of all projects.

One of the first jobs on the land was to clear it. The grass was more than head high on the entire lot and it all needed cut back and taken under control. Mom and Dad gathered machetes, hack saws, and mowers. The hard work resulted in a beautiful treasure. They found numerous young pine trees hiding there. Planted in rows with care by an owner long before.

Over the course of nine months they gutted the walls, hung new ceilings, and ran new electric. My mother, pregnant with me, used cinder blocks stacked along the back property line for an outhouse – adding more blocks the more pregnant she became.

Farmhouse before and after

Finally, the indoor plumbing was finished, drywall hung, and sub-flooring laid. Just in time for my birth in the fall. The winter brought the great blizzard of 1978.

Thankfully my parents had a wood burning stove, and an abundance of wood from clearing the land, to keep us warm. The county sheriff heard news of a baby at our address and came on snow mobile to deliver milk and essentials.

With the house nearly finished, attention was turned to the land again. The pine trees had been nibbled on by sheep, but they transplanted them to the back of the property for a wind break and each one recovered nicely. They ordered fruit trees and Mom tells the story of the planting…

“Your father had the holes already dug for the trees. We received the trees by UPS and then it began to rain, filling up the holes with water. Finally after a week of rain we decide to plant on Saturday, even if we had a monsoon. Monsoon it was and we were outside planting trees with you and your sister looking out the windows. What a bonding experience! We were wet, muddy, and tired, but the trees were planted. Every tree lived and after that every time we planted something large, we dug the hole and filled it with water!” 

There was a lovely flat area – three thousand five hundred square feet – just between the apple tree line and the back corn field. The garden was so big our friend Jeff brought his field tractor to turn the soil. With three quick swoops the first turn was done. It would have taken days with the two-wheeled rototiller my Dad shared with my Uncle.

Garden plow day

The garden’s longest side contained blackberry bushes, strawberries and asparagus patches. Walk along the rows and you would find potatoes, onions, corn, green beans, lettuces, broccoli and an occasional Tonka™ Truck. My sister and I loved making roads, mountains and creeks amide the pathways. We harvested throughout the growing season and either canned or processed by a blanch-and-freeze method for the winter.

The asparagus patch is still there. In a few weeks the first spears will be peaking through the soil and I will beg my mother for some – as I do every year. To anyone else it might just taste like asparagus, but to me it tastes like home.


Bacon Wrapped Asparagus

Ingredients:

Asparagus, one bunch (about 1 1/2 to 2 pounds)
Bacon, one pound
Cheese – Parmesan or Mozzarella, shredded

Preparation:

  • Pre-heat oven to 400 degrees
  • Line a rimmed baking sheet with foil and nest a wire rack inside.
  • Wet a paper towel with olive oil and rub generously on the rack.
  • Working with one asparagus spear and one slice of bacon at a time, snap an inch or two off the cut-end of the spear. Wrap spear with one slice of bacon.
  • Place on rack, leaving about 1/2 inch gap in between. Do not allow them to touch.
  • Once all the spears are wrapped, place in oven for 18-20 minutes, or until the bacon is to the crispness you desire.
  • Remove tray from oven and use tongs to transfer spears to a serving tray.
  • Sprinkle with cheese and serve.

Junk Meat

Jumk Meat

Meat and potatoes were a must in our house. My father was raised on just that, and lots of dessert. The first time my husband attended one of my family gatherings he was in heaven. Lots of ham, noodles, potatoes and every starch you can imagine dominated the menu. The dessert table was three times the size of the savory table and was loaded to the brim with everything you could ever wish for. There was rarely a vegetable in site except for the Green Beans (recipe coming soon…) my Mom would bring along. Dad would eat vegetables, that is, if they were cooked until limp, covered in melted butter and heavily salted.

Even though he nearly ruined any nutritional value, Dad loved to grow vegetables. Partly out of necessity (we grew most of what we ate and received government cheese and other assistance to get us by) and partly because he loved being outdoors. We planted an impressive garden every year; about twenty-five yards square when it was at its largest, and would have a friend come by with his field tractor to turn the soil at the beginning of the planting season. I loved that day and would be standing by with a bucket, my fishing pole and my bike – ready to grab some big juicy worms from the black, freshly turned dirt, and ride off to the creek down the road.

Garden plow day

The bare garden turned the most beautiful shades of green, and soon mismatched canning jars were lined up like little soldiers along the kitchen floor. They would make a distinct popping noise when sealed properly, and it really was music to our ears after a long, hot day of canning.

With all the vegetables we had on hand and the half-a-cow we had in the freezer, a chuck roast landed on the table every week. Mom would load vegeta­bles on top before cooking the meat to a moist, tender, savory finish. My sister and I would say our evening mealtime prayer in unison, memorized at a very young age. “Thank you God for bread and milk, and everything that’s good, Amen.”  The food would be passed around in a semi-orderly fashion. My sister and I would scrap off the vegetables and proclaim “I don’t want any of that junk on top.” The name ‘Junk Meat’ was born, and is used in my house today. Now I eat the ‘Junk’, and with each bite wonder why I ever scraped it off. It brings back memories of that country garden and the smells of spring every time. Served with or without the Junk, I hope this makes it to your dinner table.

Junk Meat – Full Length

PrepTime: 15 Minutes

Total: 6 hours, 15 Minutes

Ingredients:

2 1/2 to 3 lb chuck roast

1 Tablespoon olive oil

3 to 4 celery stalks cut into 1/4 inch pieces

1 pound bag baby carrots (or 4-5 carrots cut into 2 inch pieces)

1 medium white or yellow onion

1 14.5 oz can diced tomatoes (do not drain)

1/2 Teaspoon garlic powder

1/2 Teaspoon parsley flakes

3-4 medium Yukon gold potatoes, washed and cut into 2-inch cubes (reserve for later by placing in a bow,l cover with water, chill.)

Salt

Pepper

Preparation:

• Preheat oven to 350 degrees.

• Heat olive oil in a heavy dutch oven or 4” deep pot on stove top over medium to high heat.

• Using tongs place Roast in pot and listen to it sear.

• Sprinkle on 1/4 teaspoon Garlic Powder and Parsley. Lightly salt and pepper.

• Flip the Roast over, revealing the nicely seared underside. Sprinkle with remaining Garlic and Parsley. Salt and pepper this side, too.

• Once seared on both sides, turn the burner off.

• Pile on the Celery, Carrots, Onion and Tomatoes and mix them up a little.

• Lightly salt and pepper the vegetables, cover, and place in preheated oven.

• After one hour lower the oven temperature to 300 degrees.

• Cook at 300 degrees for another three to four hours (cooking time varies depending on thickness of roast).

• One hour before serving, add reserved potatoes by evenly distributing them around the edges of the pot, nestling them down in the juices. Salt the potatoes. If the pot seems dry (less than 1/8 inch liquid), add a little water.

• Cook until potatoes are tender when tested with a fork – about an hour.

• Serve!