Pan Fried Pork Chops (Gluten Free)

Fried Pork ChopsClick here for Pan Fried Pork Chops recipe.

The bacon fat jar was a fixture at the farm house. Crack open a jar of green beans – put some bacon fat on them. Lima beans? Bacon fat. Potato Soup? Start with bacon. Scrambled eggs? You guessed it. Smear that skillet with bacon fat first.

So a few weeks ago when a friend asked our Facebook Mama’s Group “I have pork in the fridge – what should I make for dinner?” My answer was, “fry it in bacon fat, of course. What could be better than pork fried in pork?”.

My, my. What interesting conversations arose from there. I found that some of my friends kept their bacon fat and it held a special place in their kitchen. Others did not. I un-friended them. (jk).


Advertisement

Fast(er) Roasted Potatoes

Roasted Potatoes

Click here for – Fast(er) Roasted Potatoes

His scent was that of a printing press. Inky. Mixed with a bit of Old Spice. An earthy undertone brought it all together in a warm blanket of protection. Consistency. He was my short, solid, bearded, refuge. He was my Dad.

Certain memories of him are in full, vibrant color. The sounds fill my ears like a wave of warmth. I can easily  trick my brain to go there.  On his lap of his La-Z-Boy recliner. The orchard. The garden.

Especially the garden. Every time I bend over the sink and wash potatoes I go to him in the garden.

It was a damp day, but he needed the soil to give way to the shovel. If we waited, the new red potatoes would get too big. The earth too hard. So I stood by the empty bushel basket and waited for him to bring up the first blade-full of dirt. The soil gave way and little burgundy gems peaked out to the daylight. I eagerly fell to my knees and plucked them out.

He moved on down the row and brought up each mound of dirt, his smile getting bigger all the way. It was a good crop. I scooted on my little bottom and knees, filling the bushel basket handfuls at a time, pushing the dirt back into place with my bare hands.

He stood at the edge of the garden. Sweaty. Smiling. Admiring the full basket of labor. I stood up and he looked in my direction. His eyes went from my head, to my filthy hands, to my soiled clothes.

With a smirk, he said, “Your Mother’s going to kill me.”

Finish tilling garden


Spiced Applesauce Snack Cake (Gluten Free)

Applesauce Cake

I often wonder why pumpkins get all the glory in the fall. Maybe it’s because the green mermaid company started squirting the flavor in everything, or maybe it goes all the way back to that little cartoon-kid and his obsession with the ‘great’ one. However it started, I find it disheartening that the ‘other’ fall flavor doesn’t get much credit.

Growing up at the farm house, my spring, summer, and fall were filled with visions of apple blossoms, bees, buds, and finally tiny round green promises that I watched grow into big beauties.

In the fall our lawn was never mowed in the straight lines and patterns that I so often enjoyed creating on the John Deere. Instead, there where zigzags. Swaths of grass cut on strange angles were evidence of my trips back and forth to the tree line so I could pick another snack off a low branch. The neighbor’s horse benefited, too. A handful of imperfect apple always made it across the fence to old JoAnn as I roared by.

We had many varieties of trees. Early apples, mid-season, and late, we were rarely without the fruit from August through October. This translates to a lot of apple recipes in my family. Here is one of the most recent – don’t let the Gluten Free label put you off, it will surprise you, and delight you. Maybe we can all work together and give the apple her glory days back.

John Deere

Spiced Applesauce Snack Cake

Ingredients

7 ½ ounces gluten free flour blend*

2 teaspoons baking powder

1 teaspoon baking soda

¼ teaspoon xanthan gum

3 large eggs

½ cup granulated sugar (3 ½ ounces)

¼ cup light brown sugar (packed) (1 ¾ ounces)

½ teaspoon salt

½ teaspoon cinnamon

¼ teaspoon nutmeg

1/8 teaspoon cloves

4 tablespoons butter, melted and cooled

¾ cup applesauce (unsweetened)

1 teaspoon vanilla

(Optional – local apple butter for topping.)

*Gluten Free Flour Blend

24 ounces white rice flour (4 ½ cups, plus 1/3 cup) (one bag of Bob’s Red Mill brand)

7 ½ ounces brown rice flour (1 2/3 cups)

7 ounces potato starch (not potato flour) (1 1/3 cup)

3 ounces tapioca starch (also called tapioca flour) (3/4 cup)

¾ ounce nonfat milk powder (3 tablespoons)

Preparation

Preheat oven to 350 degrees and set oven rack in the center position.

Lightly grease one 8 inch square cake pan, or two bread loaf pans. Cut parchment paper to fit the bottom of pan(s) and line the bottoms. Lightly grease parchment as well.

Whisk together gluten free flour blend, baking powder, baking soda and xanthan gum in a small bowl. Set aside.

In a large mixing bowl (do not use stand mixer for this recipe) whisk eggs, sugars, salt, cinnamon, nutmeg and cloves until well combined and eggs are light in color. Slowly add melted butter while whisking until combined. Incorporate apple sauce and vanilla. Last, add the dry flour mixture and thoroughly combine. Mixture should be smooth.

Pour batter into prepared pan(s). Bake until cake tester comes out clean – about 30 minutes – rotating pan(s) half way through baking time.

Cool completely before storing. Cake can be wrapped in plastic wrap and stored for up to three days in the refrigerator.

Homemade Ice Cream

Homemade Icecream

The sun is shinning through the farm house kitchen window, stretching through the doorway, and casting an orange glow over the brown shag carpeting of the family room. The smell of cake lingers in the air, interrupted every so often with whiffs of lemon scented dusting polish. The lawn mower whizzes by the back windows with a growl, and it’s the only thing I can hear over the loud whirring and grinding of the ice cream maker that is nested in the laundry tub of the mud room.  The house has been cleaned, floors vacuumed, and a small card table for presents is set up in the corner along with a chair for the guest of honor. We are just about ready.

It’s a birthday party.

Grandparents, Aunts, Uncles and Cousins will be here soon and the gathering will begin. It is not as formal as it sounds. The kids will arrive – ranging from seven years older than me to three years younger. The age differences disappear as soon as the car doors slam shut and we all run through the orchard for a game of freeze tag or balance on the porch railing like circus tight rope walkers. I bring out my rock collection (shoe) box and bug jars and my closest cousin and I comb the driveway for new additions.

An adult voice calls out from the house and we all run inside. Presents are opened and passed around, and a friendly wrapping-paper-ball fight ensues. The candles are lit, we sing the song, and the homemade cake in the shape of the birthday girl’s favorite character is cut. I carefully cup the bowl of cake with both hands and stand in line at the laundry tub as Daddy scoops from the now-quiet wooden drum. It starts to melt no sooner than it rolls down the slice of cake and nests in the bottom of the bowl.

This is the taste of summer. This is the taste of a birthday.


Home Made Ice Cream


Ingredients

1 3/4 cups whole cream

1 1/4 cups whole milk

1/3 cup plus granulated sugar

1/3 cup corn syrup

1/4 teaspoon salt

6 large egg yolks


Preparation

1. Combine cream, milk, 1/8 cup plus 2 tablespoons sugar, corn syrup, and salt in medium saucepan. Heat over medium-high heat, stirring occasionally, until mixture is steaming steadily and registers 175 degrees, 5 to 10 minutes. Remove saucepan from heat.

2. While cream mixture heats, whisk yolks and remaining 1/8 cup sugar in bowl until smooth, about 30 seconds. Slowly whisk 1 cup heated cream mixture into egg yolk mixture. Return mixture to saucepan and cook over medium-low heat, stirring constantly, until mixture thickens and registers 180 degrees, 7 to 14 minutes. Immediately pour custard into large bowl and let cool until no longer steaming, 10 to 20 minutes. Transfer 1 cup custard to small bowl. Cover both bowls with plastic wrap. Place large bowl in refrigerator and small bowl in freezer and cool completely, at least 4 hours and up to 24 hours. (Small bowl of custard will freeze solid.)

3. Remove custards from refrigerator and freezer. Dip the bottom of the frozen custard cup into warm water for easy release. Remove frozen custard from small bowl into large bowl of custard. Add 2 teaspoons vanilla extract. Stir and cut frozen custard until fully dissolved. Strain custard through fine-mesh strainer and transfer to an already-churning ice-cream machine. Churn until mixture resembles thick soft-serve ice cream and registers about 21 degrees, 20 to 30 minutes. Transfer ice cream to glass bowl or dish (I use a pyrex bowl with tight fitting lid) and press plastic wrap on surface to prevent ‘skin’ from forming. Return to freezer until firm 3 hours.

(Ice cream can be stored for up to 5 days.)


Junk Meat

Jumk Meat

Meat and potatoes were a must in our house. My father was raised on just that, and lots of dessert. The first time my husband attended one of my family gatherings he was in heaven. Lots of ham, noodles, potatoes and every starch you can imagine dominated the menu. The dessert table was three times the size of the savory table and was loaded to the brim with everything you could ever wish for. There was rarely a vegetable in site except for the Green Beans (recipe coming soon…) my Mom would bring along. Dad would eat vegetables, that is, if they were cooked until limp, covered in melted butter and heavily salted.

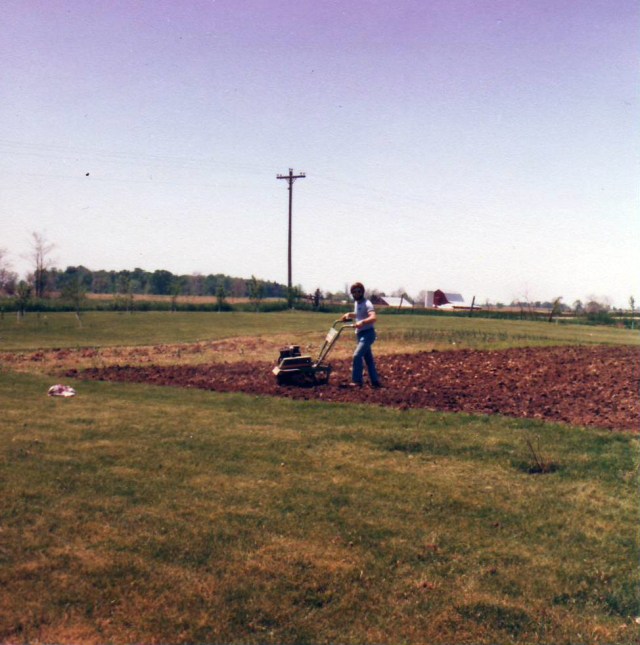
Even though he nearly ruined any nutritional value, Dad loved to grow vegetables. Partly out of necessity (we grew most of what we ate and received government cheese and other assistance to get us by) and partly because he loved being outdoors. We planted an impressive garden every year; about twenty-five yards square when it was at its largest, and would have a friend come by with his field tractor to turn the soil at the beginning of the planting season. I loved that day and would be standing by with a bucket, my fishing pole and my bike – ready to grab some big juicy worms from the black, freshly turned dirt, and ride off to the creek down the road.

Garden plow day

The bare garden turned the most beautiful shades of green, and soon mismatched canning jars were lined up like little soldiers along the kitchen floor. They would make a distinct popping noise when sealed properly, and it really was music to our ears after a long, hot day of canning.

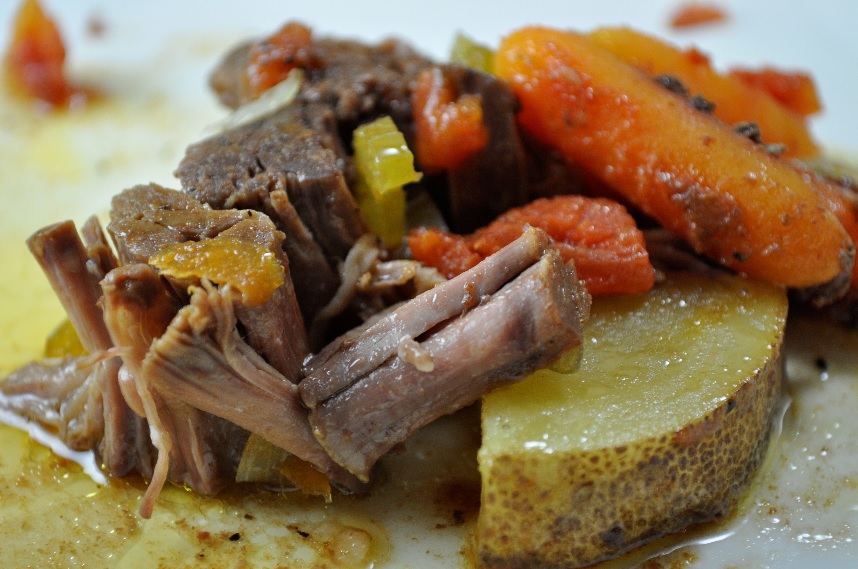
With all the vegetables we had on hand and the half-a-cow we had in the freezer, a chuck roast landed on the table every week. Mom would load vegeta­bles on top before cooking the meat to a moist, tender, savory finish. My sister and I would say our evening mealtime prayer in unison, memorized at a very young age. “Thank you God for bread and milk, and everything that’s good, Amen.”  The food would be passed around in a semi-orderly fashion. My sister and I would scrap off the vegetables and proclaim “I don’t want any of that junk on top.” The name ‘Junk Meat’ was born, and is used in my house today. Now I eat the ‘Junk’, and with each bite wonder why I ever scraped it off. It brings back memories of that country garden and the smells of spring every time. Served with or without the Junk, I hope this makes it to your dinner table.

Junk Meat – Full Length

PrepTime: 15 Minutes

Total: 6 hours, 15 Minutes

Ingredients:

2 1/2 to 3 lb chuck roast

1 Tablespoon olive oil

3 to 4 celery stalks cut into 1/4 inch pieces

1 pound bag baby carrots (or 4-5 carrots cut into 2 inch pieces)

1 medium white or yellow onion

1 14.5 oz can diced tomatoes (do not drain)

1/2 Teaspoon garlic powder

1/2 Teaspoon parsley flakes

3-4 medium Yukon gold potatoes, washed and cut into 2-inch cubes (reserve for later by placing in a bow,l cover with water, chill.)

Salt

Pepper

Preparation:

• Preheat oven to 350 degrees.

• Heat olive oil in a heavy dutch oven or 4” deep pot on stove top over medium to high heat.

• Using tongs place Roast in pot and listen to it sear.

• Sprinkle on 1/4 teaspoon Garlic Powder and Parsley. Lightly salt and pepper.

• Flip the Roast over, revealing the nicely seared underside. Sprinkle with remaining Garlic and Parsley. Salt and pepper this side, too.

• Once seared on both sides, turn the burner off.

• Pile on the Celery, Carrots, Onion and Tomatoes and mix them up a little.

• Lightly salt and pepper the vegetables, cover, and place in preheated oven.

• After one hour lower the oven temperature to 300 degrees.

• Cook at 300 degrees for another three to four hours (cooking time varies depending on thickness of roast).

• One hour before serving, add reserved potatoes by evenly distributing them around the edges of the pot, nestling them down in the juices. Salt the potatoes. If the pot seems dry (less than 1/8 inch liquid), add a little water.

• Cook until potatoes are tender when tested with a fork – about an hour.

• Serve!