Meaty Marinara Sauce (Gluten Free) (Slow Cooker)

It’s so good I missed the photo op…

_DSC0498

There are several things that makes this Meaty Marinara Sauce one of my go-to meals. First off, it uses one of my favorite things – a slow cooker. Second, my other business is on full throttle, and that means I have little to no time to put a meal on the table every night. But since I have expensive taste, going out to dinner regularly is not healthy for the wallet, let alone my waist line. The third and final reason? I think I was Italian in another life.

My friend Vintage Thread gave me the original recipe and, me being me, couldn’t leave well enough alone. So I tweaked it here and there, and now I make it in large quantities and freeze it in four-person portions. It’s quick, easy, and hearty. Just what we need right now in the Midwest where the weather seemed to take summer, pole vault right over fall, and land us firmly in winter.

_DSC0497

Meaty Marinara Sauce

Ingredients:
1/2 lb ground beef
1/2 lb spicy sausage
1/2 lb ground turkey
1 onion, diced
2 – 15 ounce cans tomato sauce (Hunt’s brand or better)
2 – 12 ounce cans tomato paste (Hunt’s brand or better)
2 envelopes (approximately 1.5 ounces each)Italian spaghetti sauce seasoning mix (McCormicks or Lawry’s brand)
1 tablespoon sugar
1 teaspoon oregano (freshly minces, or dried)
1 clove garlic (pushed through a press, or minced very fine)
1/2 teaspoon salt
1/4 teaspoon pepper
1 teaspoon Lawry’s Seasoned Salt
4 cups water

Preparation:
•    In a large skillet over medium heat, brown the meat until no longer pink. Cook the onions until soft and translucent. Drain well and transfer to slow cooker.
•    Stir in all remaining ingredients and set slow cooker on Low for 8 hours.
•    Serve with pasta and top with Romano or Parmesan cheese.

NOTES:
Freeze left overs in one cup servings for later use. To thaw, place in refrigerator overnight or microwave for 2 minutes at 50% power. Transfer to sauce pan to heat on stove top until pasta is ready and sauce is hot.

Advertisement

Italian Meatballs (Gluten Free)

Meatballs1

My 16th birthday was just one week away. The big day included an appointment at the local BMV for my driver’s test, an appointment at the orthodontist to remove my three-year-old braces, and most importantly, I planned to go job hunting.

You see, a few weeks prior, I attended a meeting at my school for the foreign language club and learned of a twenty-one-day European tour offered to their members. I had the itinerary memorized.

(…and I still do…Land in Madrid, via New York City. Take a night train to Paris. Ride a tour bus and stop in Lucerne, Switzerland, head south into Italy and stop in Florence, Sienna, and Rome. Make our way back north to Venice, then skip over to Austria and see Innsbruck. Germany is next with a stop in Munich and Frankfurt. Skip up to the Netherlands and say hello to Amsterdam then hop on the ferry over to England and spend a day in London. Pack our bags for good and head home.)

That evening I took all the brochures home to my parents to plead my case. In my mind, the fact that I would be the first to have this awesome opportunity to travel parts of the world only my Grandfather had seen during the war was a no brainer. They should say “yes”, sign up for the payment plan, and in nine months I would be on my way.

Instead, they said nothing. They looked at one another. My Dad looked at Mom, then mumbled to me “No way we can pay for this. Get a job and pay for it yourself.” That was the end of the discussion*.

So, I needed a job.

First stop. Bob Evans restaurant. I had on my Sunday best, I couldn’t stop smiling from the new feeling of smooth teeth, and I marched on in there and handed the manager my application. He hired me on the spot. Just three shifts a week, but it was a start.

I trained, learned, became a shift leader, and everyone knew I would pick up any hours available. Six months later, all the installment payments were made and the remaining three months I worked for spending money.

The summer between my Sophomore and Junior year of high school became a journey of a lifetime, and this is precisely when I fell in love with anything and everything Italian. Especially the food.

It was seven years before I found a meatball in my hometown that rivaled those in my fond memories. Mystery Man and I stumbled upon a hole-in-the-wall Italian place named “Armando’s Italian Market”. We became so well known in the joint that Lady Linda at the front counter covertly shared his Italian Meatball secrets with us. After Armando retired and closed the place down, we set our minds to making them ourselves.

*One week before jetting off to Europe at the age of sixteen, Dad approached Mom and told her they could not possibly let me go – I was too young, naive, and had never traveled more than one state from my hometown. He was not serious when he told me to get a job. That was his way of saying “no”.  While Mom agreed, she would not let my hard work go without reward and she
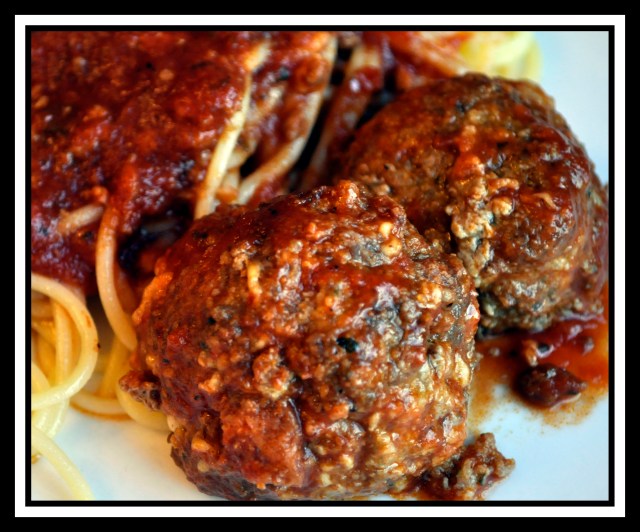
Here they are!

*While Armando’s were not Gluten Free, I have adapted this recipe to meet my dietary needs.


Meatballs4


Spicy Italian Meatballs
Makes approximately 72 (2 ounce) meatballs


Ingredients:
3 lbs ground beef
3 lbs spicy Italian sausage (casings removed)
3 c. Romano Cheese (grated)
3 c. Dry Italian Bread Crumbs (One whole loaf of Udi’s white sandwich bread, and various spices. See instructions below.)
6 eggs
6 cloves garlic

Canola Oil for Deep Fryer


Preparation:
•    Pour canola oil into deep fryer to the ‘fill’ line. Heat to 300 degrees.
•    Working in small batches at a time, place 1/2 pound ground beef, 1/2 pound spicy Italian sausage, 1 cup Romano cheese, 1 cup bread crumbs, 1 egg and 1 clove of grated garlic in a large food processor. Combine for approximately 15 seconds (or mix by hand in a large bowl).
•    Roll into 2” balls. (I weigh them into 2 ounce portions)
•    Place on a rimmed baking sheet.
•    Using tongs, place meatballs into fryer basket, being careful not to overcrowd.
•    Fry for five minutes.
•    Remove from the fryer and place on cooling rack nested in a rimmed baking sheet.
•    Repeat with remaining meatballs.
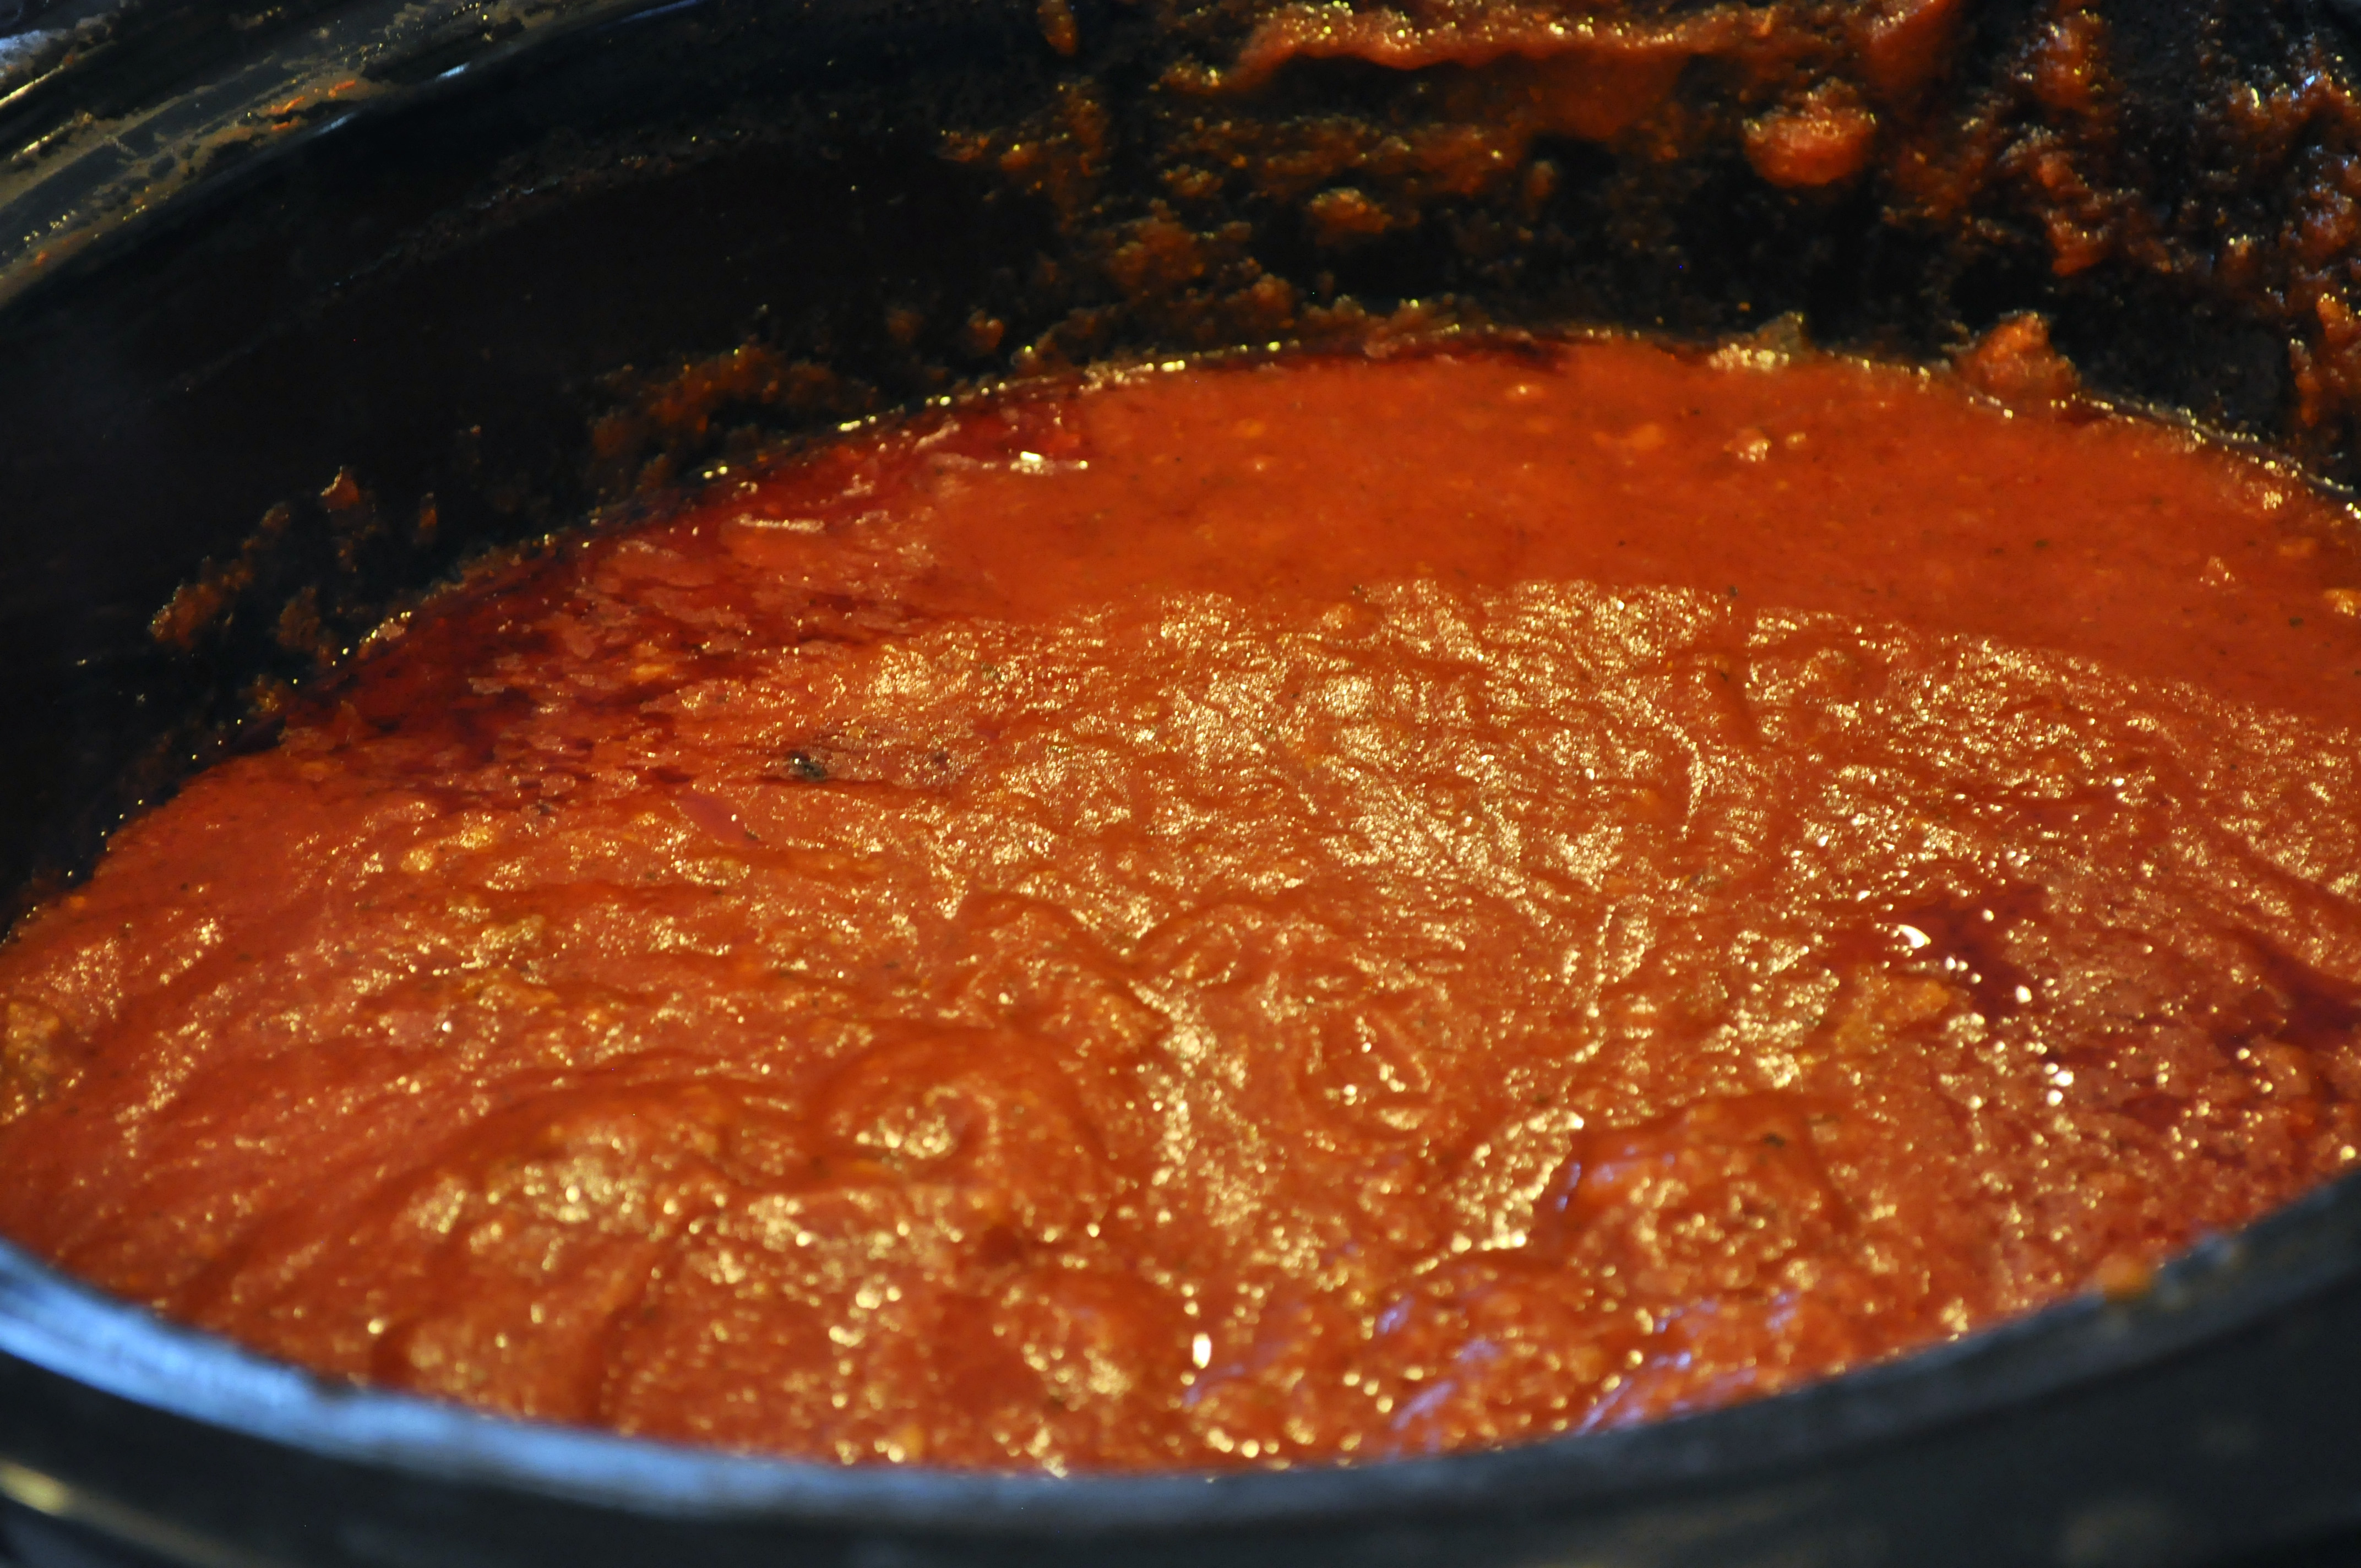
•    Place number of desired meatballs into saucepan with marinara sauce, heat through and serve.


NOTES:
Use only Romano cheese.

To freeze meatballs, let them cool completely and portion desired amount in quart size freezer bags. Thaw directly in warm marinara sauce.

Make your own bread crumbs:
Place 1/4 Udi’s bread loaf in food processor. Pulse until all bits and pieces are smaller than a pea. Add Italian seasonings, such as Oregano, Thyme, Basil, Garlic Powder, etc. Toss crumbs with olive oil and spread out over two rimmed baking sheets. Bake at 400 degrees until brown. Cool completely before using. (Freeze any leftover crumbs for other recipes.)

Slow Cooker Beef Roast (Gluten Free)

Crock Pot Roast

Dressed in new clothes and carrying a new back pack, I stood at the end of the gravel drive way and kicked some stones around with my spot-free velcro-topped shoes. Hearing a vehicle in the distance, I squinted down the two-lane country road with my hand across my brow. The sun was just coming over the hill and it was big, blazing, and threatening to make it one of the hottest first days of school yet.

They would have the cattle barn fans set in the corners of the school hallways. Turned on top speed they could make the whole school vibrate, and the low and loud growl came in stereo everywhere you turned. Luckily the school grounds had very nice and tall shade trees, and on days like this class would be held outside under a canopy of leaves.

The start of school was always the start of a hectic schedule. The days of bike riding, rock collecting, and the constant pestering of my sister were ending (ok, I never stopped pestering her…) and were replaced with school during the day, and homework, apple picking, garden harvesting and canning in the evenings and on weekends.

Now years later, my environment has changed but the onset of Fall still brings a busy schedule unlike any other time of the year. While my days of apple picking and garden harvesting are gone, they have been replaced by increased baking orders, new teaching sessions for dance, and a back to school push that has me drowning in permission slips, health forms and supply hunting for my children’s classrooms.

While my days get shorter, I still manage to get dinner on the table and (try to) avoid the take-out trap as much as possible. There are two ways I accomplish this. My slow cooker, and easy recipes that are tried and true.


Slow Cooker Pot Roast

(adapted from my friend Vintage Thread‘s recipe)


Ingredients:

1 – 2.5 to 3 pound beef roast

1 can Gluten Free Cafe’ Mushroom Soup (or one can Campbell’s condensed mushroom soup.)

1 package dried onion soup mix (if making gluten free, be sure to check the label.)

salt and pepper

Crock Pot Roast2


Preparation:

Salt and pepper both sides of roast and place in slow cooker. Pour or spoon mushroom soup over the top. Sprinkle with entire package of dry soup mix.

Set the slow cooker to 6-8 hours on low.


Best served with white rice or mashed potatoes and a green salad.


Cheese Ball

Cheese Ball 1

Around 1983 Mom and Dad took a huge step into the electronic age. The T.V with fake wood grain, knobs, and a temper, was replaced with a sleek black beauty complete with a remote control. Beneath that beautiful television was our very first VCR hiding behind the glass of a shiny new stand. In the kitchen sat a box with a door, window and touch-pad. Yes, a microwave!

I don’t quite remember how or why we ended up with all of these new things at once. Maybe Dad won the drawing at the American Legion in town again. It might have been the reward of a big catering job, or perhaps just good old fashioned puttin money in the bank. Whatever it was, my sister and I were excited at the idea of making dinner in less than five minutes and eating on the couch while enjoying a movie.

One weekend soon after our new purchases, they came home with the Star Wars movies. I had never seen them even though I had an Ewok stuffed animal. Mom laid out snacks on the coffee table. Microwaved popcorn, cheese ball and beef roll-ups. We gathered our drinks and sacked out on the couch for an evening of fun. I am pretty sure we watched all three movies that weekend. But at the age of six, my attention span was not very long, so I missed pieces here and there and probably snoozed through some too.

The evenings of snacks and movies were few and far between. In fact the only other two I can recall were Top Gun a few years later and Dirty Dancing a year after that. But in all the time that passed in between, one thing was constant. Mom always made the same snacks.

In my college years the Star Wars movies were released in theaters one more time. My friends were movie buffs and some of them found it neces­sary to dress in costume for the big release nights. We stood in line for hours on the night of the first showing, and once inside we had our bags of popcorn and enormous sodas by our sides.

The theater went dark and the crowd clapped and screamed in excitement. The famous yellow words scrolled up the star-studded screen into space. The music boomed in our ears and I reached for my first bite of popcorn. Suddenly, I was over­come by a familiar craving. I needed a Cheese Ball.

UPDATE

Just last week we took the family to Star Wars Weekend at Disney World. Some things never change – I still wanted a cheese ball so I came home and made one.

Cheese Ball Post

Chipped Beef Cheese Ball

Ingredients:

1 – 8 ounce package cream cheese

1 medium onion

6 oz  thinly-sliced corned beef, chopped into ¼ inch squares (you can use a Buddig 2 oz package)

Preparation:

• Soften the cream cheese (leave at room temperature for an hour, or unwrap and microwave 15 seconds at a time until softened).

• Place the onion in a food processor and blend for about thirty seconds. Transfer to a mesh strainer over a bowl and press the juice out with a rubber spatula. You will need 2 tablespoons of juice.

Cheese Ball Onion Step

• Using a stand mixer with the paddle attachment (or a hand held mixer), combine the cream cheese and onion juice until it is smooth and completely integrated – about a minute on medium speed.

• Reserve 1/4 cup of the chopped beef and set aside

• Add the remainder of the chopped beef to the cheese mixture and combine – about ten seconds on medium speed.

• Form the mixture into a ball using a rubber spatula. Turn out onto serving platter, or plastic wrap if serving later.

• Cover the surface of the ball with the reserved chopped beef.

• Cover and chill for up to two days.

• Serve with assorted crackers.

NOTES: I usually double this recipe for a crowd and make one large ball.

Junk Meat

Jumk Meat

Meat and potatoes were a must in our house. My father was raised on just that, and lots of dessert. The first time my husband attended one of my family gatherings he was in heaven. Lots of ham, noodles, potatoes and every starch you can imagine dominated the menu. The dessert table was three times the size of the savory table and was loaded to the brim with everything you could ever wish for. There was rarely a vegetable in site except for the Green Beans (recipe coming soon…) my Mom would bring along. Dad would eat vegetables, that is, if they were cooked until limp, covered in melted butter and heavily salted.

Even though he nearly ruined any nutritional value, Dad loved to grow vegetables. Partly out of necessity (we grew most of what we ate and received government cheese and other assistance to get us by) and partly because he loved being outdoors. We planted an impressive garden every year; about twenty-five yards square when it was at its largest, and would have a friend come by with his field tractor to turn the soil at the beginning of the planting season. I loved that day and would be standing by with a bucket, my fishing pole and my bike – ready to grab some big juicy worms from the black, freshly turned dirt, and ride off to the creek down the road.

Garden plow day

The bare garden turned the most beautiful shades of green, and soon mismatched canning jars were lined up like little soldiers along the kitchen floor. They would make a distinct popping noise when sealed properly, and it really was music to our ears after a long, hot day of canning.

With all the vegetables we had on hand and the half-a-cow we had in the freezer, a chuck roast landed on the table every week. Mom would load vegeta­bles on top before cooking the meat to a moist, tender, savory finish. My sister and I would say our evening mealtime prayer in unison, memorized at a very young age. “Thank you God for bread and milk, and everything that’s good, Amen.”  The food would be passed around in a semi-orderly fashion. My sister and I would scrap off the vegetables and proclaim “I don’t want any of that junk on top.” The name ‘Junk Meat’ was born, and is used in my house today. Now I eat the ‘Junk’, and with each bite wonder why I ever scraped it off. It brings back memories of that country garden and the smells of spring every time. Served with or without the Junk, I hope this makes it to your dinner table.

Junk Meat – Full Length

PrepTime: 15 Minutes

Total: 6 hours, 15 Minutes

Ingredients:

2 1/2 to 3 lb chuck roast

1 Tablespoon olive oil

3 to 4 celery stalks cut into 1/4 inch pieces

1 pound bag baby carrots (or 4-5 carrots cut into 2 inch pieces)

1 medium white or yellow onion

1 14.5 oz can diced tomatoes (do not drain)

1/2 Teaspoon garlic powder

1/2 Teaspoon parsley flakes

3-4 medium Yukon gold potatoes, washed and cut into 2-inch cubes (reserve for later by placing in a bow,l cover with water, chill.)

Salt

Pepper

Preparation:

• Preheat oven to 350 degrees.

• Heat olive oil in a heavy dutch oven or 4” deep pot on stove top over medium to high heat.

• Using tongs place Roast in pot and listen to it sear.

• Sprinkle on 1/4 teaspoon Garlic Powder and Parsley. Lightly salt and pepper.

• Flip the Roast over, revealing the nicely seared underside. Sprinkle with remaining Garlic and Parsley. Salt and pepper this side, too.

• Once seared on both sides, turn the burner off.

• Pile on the Celery, Carrots, Onion and Tomatoes and mix them up a little.

• Lightly salt and pepper the vegetables, cover, and place in preheated oven.

• After one hour lower the oven temperature to 300 degrees.

• Cook at 300 degrees for another three to four hours (cooking time varies depending on thickness of roast).

• One hour before serving, add reserved potatoes by evenly distributing them around the edges of the pot, nestling them down in the juices. Salt the potatoes. If the pot seems dry (less than 1/8 inch liquid), add a little water.

• Cook until potatoes are tender when tested with a fork – about an hour.

• Serve!